
Compressing an image does not have to mean making it blurry, pixelated, or noticeably worse. If you know how to compress an image without losing quality, you can reduce a file’s size while keeping it sharp enough for websites, emails, documents, social media, and everyday use.
The key to learning how to compress an image without losing quality is understanding what actually affects image size and quality. The format you choose, compression level, image dimensions, and the type of image you’re working with can all make a difference.
In this guide, you’ll learn how to compress an image without losing quality, which image format to choose, what quality settings to try, and how to get a smaller file without ruining the original image.
What Does Image Compression Actually Do?
Image compression reduces the amount of data needed to store an image.
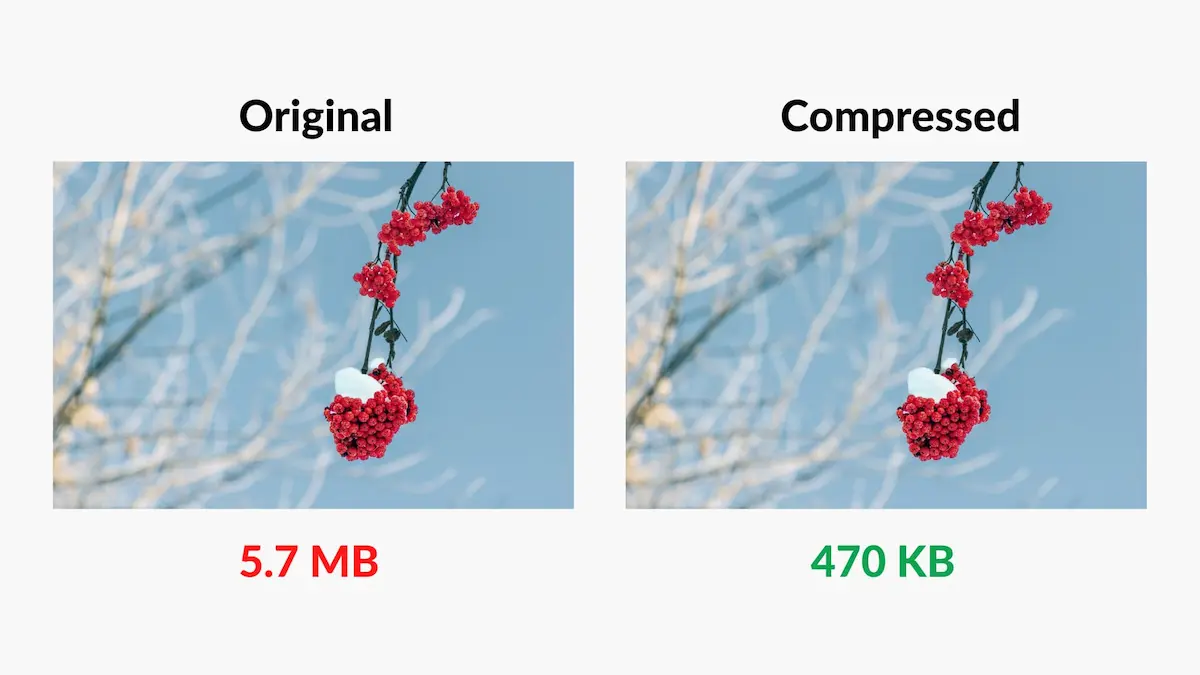
A modern photo can easily be several megabytes because it contains a large amount of visual information. When you compress it, unnecessary or less noticeable information can be reduced so the resulting file takes up less storage space — this is the core idea behind every method to compress an image without losing quality.
There are two main approaches:
- Lossy compression removes some image information to achieve a much smaller file.
- Lossless compression reduces file size without removing the original image information.
For photographs, lossy compression can often produce a much smaller file while still looking nearly identical at normal viewing sizes — which is exactly what it means to compress image without losing quality in practice.
The goal isn’t necessarily to keep every single byte of the original file. The goal is to find a good balance between file size and visual quality.
How to Compress an Image Without Losing Quality
The easiest approach is to use an image compressor that lets you control the output quality.
With an online browser-based compressor, the basic process to compress an image without losing quality is usually:
- Select or drag your image into the compressor.
- Choose an appropriate output format.
- Adjust the quality level if necessary.
- Compare the resulting image with the original.
- Download the compressed version.
You can use the MintifyTools Image Compressor & Converter to compress image without losing quality directly in your browser.
The important part is not simply choosing the lowest possible quality. Instead, reduce the file size gradually until you reach a point where the image still looks good for its intended purpose.
Choose the Right Image Format
One of the easiest ways to compress an image without losing quality is to use an appropriate format.
JPG/JPEG
JPG is generally a good choice for photographs, screenshots with many colors, and other images containing continuous tones.
It uses lossy compression, which means some information is discarded to achieve a smaller file.
For many ordinary photos, JPG can provide a good balance between image quality and file size, making it one of the most reliable ways to compress image without losing quality.
PNG
PNG is useful when you need transparency or when an image contains graphics, icons, diagrams, or areas of flat color.
PNG can sometimes produce larger files than JPG for photographs, so converting a photographic image from PNG to JPG may substantially reduce its size.
However, you shouldn’t automatically convert every PNG to JPG. If transparency is important, JPG isn’t an appropriate replacement because it doesn’t preserve transparent backgrounds.
WebP
WebP is a modern image format designed for efficient web delivery. It can provide smaller files while maintaining good visual quality, depending on the image and encoding settings, and is often the best option to compress an image without losing quality for modern websites.
For websites, WebP can be a useful option when browser and workflow compatibility meet your requirements.
Google also recommends modern image optimization and responsive techniques to balance image quality and page performance.
Don’t Reduce Quality More Than You Need
One of the biggest mistakes people make when trying to compress image without losing quality is immediately choosing an extremely low quality setting.
A smaller file isn’t always a better result.
For example, if an image looks excellent at a moderately reduced quality setting, there may be little reason to compress it further just to save another few kilobytes.
Instead, try a moderate setting first and inspect the result.
Look closely at:
- Faces
- Small text
- Fine details
- Edges
- Shadows
- Gradients
- Textures
Compression problems can become especially noticeable around text and sharp edges.
If you see obvious blocks, halos, smearing, or loss of detail, increase the quality or try a different format.
Image Dimensions Matter Too
Quality isn’t the only factor that controls file size — dimensions play a big role when you want to compress an image without losing quality.
The dimensions of the image matter as well.
A 6000 × 4000 pixel photograph contains far more pixels than a 1600 × 1067 image. If you only need the image for a small website thumbnail, keeping the original dimensions may be unnecessary.
For example, imagine you have a huge photograph that will only appear at 800 pixels wide on your website.
Reducing its dimensions before uploading it can eliminate a large amount of unnecessary data.
This is particularly useful for websites because large images can contribute significantly to page weight. Google notes that images are often among the largest contributors to overall page size, making image optimization important for a good user experience.
Compression Quality vs File Size
Think of image compression as a balance.
Higher quality → usually larger file
Lower quality → usually smaller file
There isn’t one perfect quality percentage for every image, which is why the best way to compress image without losing quality is to test and compare rather than rely on a fixed number.
A photograph with lots of textures may behave differently from a simple graphic. One image may still look good at a relatively low setting, while another may show visible artifacts much sooner.
That’s why it’s better to look at the result instead of relying on a single number.
If your compressor provides a quality slider, start around a moderate level and adjust it according to the result.
How to Compress Images for Websites
Website images deserve special attention because visitors have to download them before they can see them.
Before uploading an image to your website, consider:
- Does the image really need its current dimensions?
- Is JPG, PNG, or WebP the most appropriate format?
- Is the quality higher than necessary?
- Can the file be compressed without visible damage?
For example, uploading a multi-megapixel camera photo when the image will only be displayed as a small thumbnail can waste bandwidth.
A properly optimized image can help reduce unnecessary page weight while preserving a good visual experience — the whole point of learning to compress an image without losing quality.
Google’s image SEO guidance also recommends using high-quality images while applying appropriate optimization and responsive techniques for speed and quality.
How to Compress a Photo Without Making It Blurry
If your compressed image looks blurry, don’t immediately assume compression itself is the problem.
Check these things:
1. The quality setting may be too low Increase the quality and compare the result again.
2. The image may have been resized too much If you reduce the dimensions dramatically, fine details may disappear.
3. You may be repeatedly compressing the same file Repeated lossy compression can gradually reduce image quality. Whenever possible, work from the highest-quality original rather than repeatedly compressing an already compressed copy.
4. You may be using the wrong format A photograph saved as PNG may be unnecessarily large, while a graphic requiring transparency may not work properly as JPG.
Choose the format according to the image rather than using one format for everything — this small step makes a real difference when you try to compress image without losing quality.
Can You Compress an Image Without Any Quality Loss?
It depends on what you mean by “quality loss.”
With lossless compression, the original image information can be preserved, but the reduction in file size may be relatively limited for some images.
With lossy compression, you can achieve much greater file-size reductions, but some information is discarded.
The practical goal for many photographs is therefore not “zero information removed.” It is visually lossless compression — the file becomes smaller while the difference is difficult or impossible to notice, which is what most people really mean when they say they want to compress an image without losing quality.
A Simple Compression Workflow
If you’re unsure where to start, use this workflow to compress image without losing quality every time:
Step 1: Start with the original image. Step 2: Decide where you’ll use it — website, email, form, social media, or something else. Step 3: Choose the appropriate format. Step 4: Compress it at a moderate quality setting. Step 5: Check the file size. Step 6: Open the compressed image and compare it with the original. Step 7: If it still looks good, you’re done.
If the file is still too large, reduce the quality slightly or resize the image if its dimensions are unnecessarily large.
This approach is usually better than aggressively compressing the image in one step.
Use an Image Compressor & Converter
If you want a quick way to compress an image without losing quality, you don’t necessarily need desktop software.
MintifyTools Image Compressor & Converter lets you compress and convert supported image files directly in your browser.
You can use it when you need a smaller image for a website, email, online form, document upload, or another everyday purpose.
If your goal is a specific limit, such as 100KB, you may need to experiment with quality, dimensions, and format because different images respond differently to compression.
Frequently Asked Questions
Does compressing an image reduce quality? It can, depending on the compression method and settings. Lossy compression removes some information, while lossless compression preserves the original information. With suitable settings, you can compress an image without losing quality in a way that’s virtually unnoticeable.
What is the best image format for compression? There isn’t one format that is best for every image. JPG is often effective for photographs, PNG is useful for transparency and certain graphics, and WebP can be an efficient option for many web images.
What quality should I use when compressing an image? There is no universal setting that works perfectly for every image. Start with a moderate quality level and inspect the result. Increase or decrease it depending on the visual quality and file size you need.
How can I reduce an image to 100KB? You may need to adjust the image’s quality, dimensions, or format. Start with moderate compression and gradually reduce the file size until you reach the required limit while keeping the image acceptable for its purpose.
Is it better to resize an image or compress it? Sometimes the best result comes from doing both. If an image is much larger in dimensions than necessary, resizing it can remove unnecessary pixels. Compression can then reduce the remaining file size further.
Final Thoughts
The best way to compress an image without losing quality is to avoid treating file size as the only goal.
Choose the right format, use sensible dimensions, start with moderate compression, and always check the final image before using it.
For photographs, JPG or WebP may offer an effective balance between size and quality. For images requiring transparency, PNG may be more appropriate. And when an image is much larger than its intended display size, resizing it can make a significant difference.
Most importantly, don’t compress more than necessary. A file that is a few kilobytes smaller isn’t worth it if the image becomes visibly blurry or damaged — and now you know exactly how to compress image without losing quality the right way.
Pingback: How to Reduce Image File Size Without Losing Quality (2026)